 how-to
How to Repair Rot in Wood Pergolas: A Step-by-Step Guide
Table of Contents
- Signs of Structural Wood Rot to Watch For
- Inspecting Your Pergola for Rot and Damage
- Step 1: Remove Rotted Wood with Hand Tools
- Step 2: Assess Damage Severity and Repair vs. Replace
- Step 3: Stabilize Damaged Wood Fibers with Wood Hardener
- Step 4: Fill Gaps with Exterior-Grade Wood Filler and Epoxy Repair
- How to Replace a Pergola Post
- Finding and Fixing the Moisture Source
- Frequently Asked Questions
Last Updated: October 17, 2026
Signs of Structural Wood Rot to Watch For
Learning how to repair rot in wood pergolas starts with understanding that wood rot compounds quickly. What starts as soft spots and discoloration can compromise the entire structure.

Moisture is the root cause. If your pergola sits in a humid climate or collects water in joints and crevices, rot will develop.
Pay special attention to:
- Post bases where wood meets the ground
- Joints where beams connect
- Underside of horizontal members that collect water
The earlier you catch rot, the easier the repair.
Inspecting Your Pergola for Rot and Damage
A thorough inspection takes about 30 minutes and a few basic tools. Look for soft wood, discoloration, and structural weakness, starting from the ground and working up.
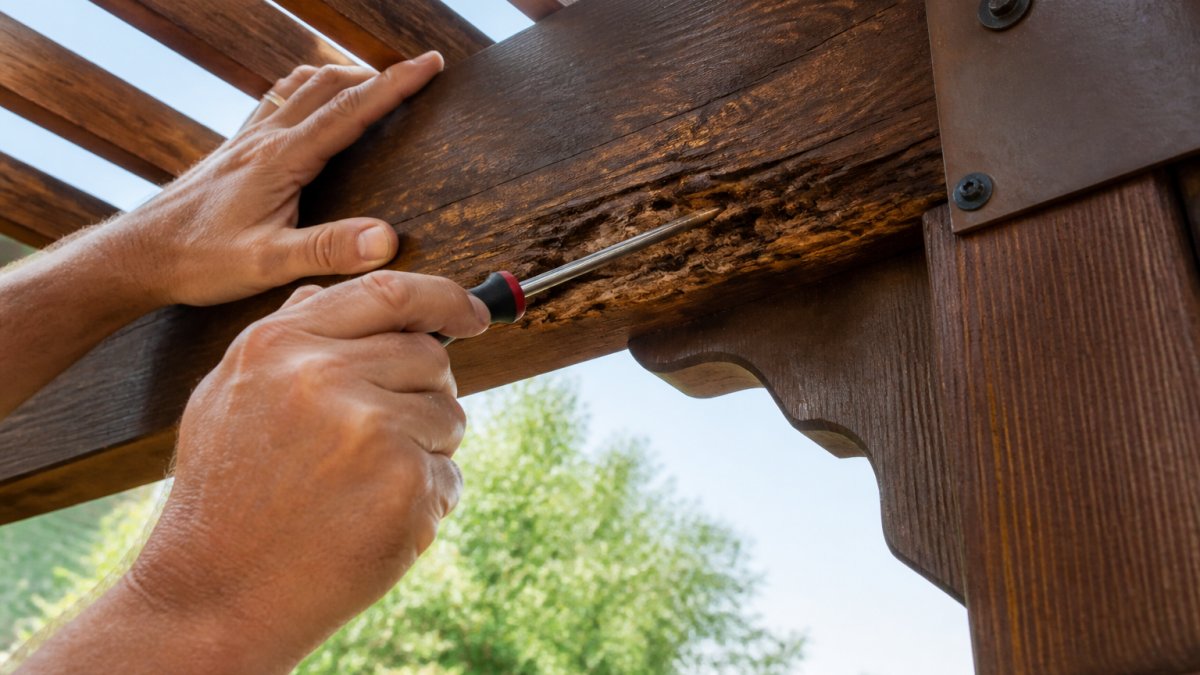
What You'll Need Before Starting
Gather these items before you begin:
- Screwdriver or awl (a pointed tool works best)
- Flashlight or headlamp
- Notebook to record problem areas
How to Inspect Each Section
Start with the posts. Press your screwdriver into the wood at multiple points, especially near the base.
Move to the beams. Check the top surface where water sits and the underside where moisture hides.
Examine the overhead structure. Thin trellis work and smaller members rot quickly. Scan for dark spots, peeling paint, or fuzzy growth.
Document what you find:
- Location of soft spots
- Size of affected area (small, medium, large)
- Whether the damage is surface-level or deep
One soft post is fixable; multiple soft posts may need extensive work.
Step 1: Remove Rotted Wood with Hand Tools
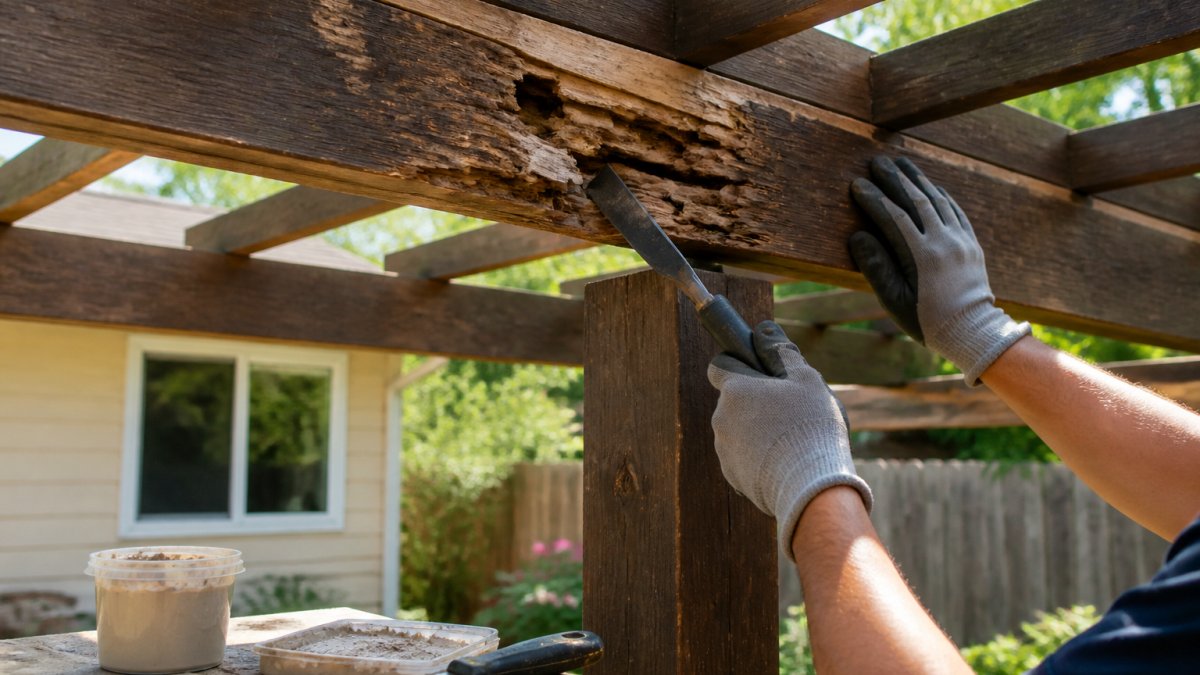
When you learn how to repair rot in wood pergolas, the first goal is to remove all soft, deteriorated wood.
Start with a screwdriver or chisel. Push the tool into the soft wood and pry gently.
Work from the outside in, removing all dark, soft material until you hit solid wood.
Use these tools in order:
- Screwdriver or awl to probe and break up soft wood
- Chisel to pry out larger chunks
- Scraper to smooth the edges of the hole
Wear safety glasses; splinters and dust fly. A dust mask helps if you're sanding.
The cavity doesn't need to be pretty, just clean.
Step 2: Assess Damage Severity and Repair vs. Replace
Once the rot is removed, you can see how deep it goes and where it sits. Depth, location, and structural role determine whether a repair is safe or a member must be replaced. A 2-inch soft spot on a decorative trellis slat is trivial; the same spot on the base of a main load-bearing post is a serious structural concern.
Use this three-factor framework to make the call.
Factor 1: Depth of Rot Relative to Wood Thickness
Measure the depth of the cavity and compare it to the member's actual thickness. As a working rule:
- Surface-level rot (less than 1/4 inch deep on a 1-1/2-inch-thick board, or less than 10% of the member's thickness) is almost always repairable with hardener and filler.
- Moderate rot (1/4 to 1/2 inch deep, or 10-30% of thickness) is repairable if the remaining cross-section is sound and the member is not a primary load path.
- Deep rot (more than 1/2 inch deep, or more than 30% of thickness) usually warrants replacement, especially on posts, beams, and any member carrying roof or snow load.
Factor 2: Location on the Member
Rot in the middle of a span is less critical than rot at a connection point. End grain, post bases, and joinery absorb water first and lose strength fastest.
- Post base (within 12 inches of the footing): High concern. This is where bending moments and moisture both peak. Even moderate rot here can lead to sudden failure under wind load.
- Beam end or notch: High concern. Notches and end cuts expose end grain and concentrate stress. Rot here often means the connection is compromised.
- Mid-span surface damage: Lower concern if depth is shallow. Cosmetic and minor structural repairs are usually fine.
Factor 3: Structural Role of the Member
Ask what the member does. A decorative rafter or trellis piece can often be repaired or even left until it fails cosmetically. A main post, header beam, or any member supporting overhead load is different.
- Primary structural members (main posts, carrying beams, ledger boards): Replace if rot is more than surface-level or if more than one member in a bent is affected.
- Secondary members (rafters, purlins, slats): Repair is usually acceptable if depth is moderate and the member is not carrying significant load.
- Non-structural trim and lattice: Repair or replace based on appearance; structural risk is minimal.
A Practical Decision Checklist
Run through these questions in order. Stop at the first "yes" that points to replacement.
- Is the rot deeper than 30% of the member's thickness? → Replace.
- Is the rot within 12 inches of a footing, beam end, or primary connection? → Replace or consult a professional.
- Is the member a main post, carrying beam, or ledger? → Replace if rot is more than surface-level.
- Can you wrap your hand around the remaining solid wood on a post or beam? → Replace.
- Does the damage span more than half the width of the member at any cross-section? → Replace.
If you answered no to all five, repair with hardener and epoxy filler is reasonable. If any answer is yes, replacement is the safer path.
Document your decision and take photos before you cover anything up. If you later sell the home or make a warranty claim, that record shows the repair was deliberate rather than cosmetic.
Step 3: Stabilize Damaged Wood Fibers with Wood Hardener
Wood hardener is a liquid that soaks into damaged wood and hardens the remaining fibers.
Apply hardener to all exposed wood inside the cavity with a brush or applicator.
Follow the product instructions for drying time; most hardeners need 24 hours to cure.
The hardened wood feels firm and won't crumble when pressed.
Hardener works best on wood that still has some structural integrity.
Step 4: Fill Gaps with Exterior-Grade Wood Filler and Epoxy Repair
Pack the filler into the cavity with a putty knife, pressing firmly.
Let it cure fully, usually 24 hours, but check the label. Don't sand or seal until it's completely hard.
Sand the repair smooth once it's dry. Start with 80-grit sandpaper and progress to 120-grit for a fine finish.
Seal the repair. Use exterior wood stain or paint to match the rest of your pergola.
How to Replace a Pergola Post
Replacing a rotted post is the highest-risk repair in this guide. The post carries part of the pergola's weight and resists wind and snow loads. Before you cut anything, you need to understand the load path and install temporary support that actually works. If you are not confident working with temporary shoring or heavy lumber, hire a licensed contractor, this is not a cosmetic repair.
Understand the Load Path First
A post carries vertical load from the beams above and transfers it to the footing. It also resists lateral loads from wind. When you remove a post, the adjacent posts and connections must temporarily carry that load. If the pergola has more than two posts in a row, removing one post in the middle is more demanding than removing an end post, because the middle post carries more tributary load.
Temporary Support: What Actually Works
Use adjustable steel shoring posts (often called screw jacks or Acrow props) or sturdy 4x4 lumber cut to fit.
- Adjustable steel posts are fastest and safest because you can tighten them to load-bearing contact. Rent them from a local tool rental yard.
- 4x4 lumber works if you cut it to a snug fit and drive wedges at the top to take up load. Use a level to confirm the beam is not lifting or dropping as you tighten.
- Base plates or blocking distribute load and prevent the temporary post from punching into soil.
Tighten temporary supports until they are firmly in contact but do not jack the beam upward. You want to take the load off the rotted post, not lift the structure. Check the beam with a level before and after tightening; if it moves, back off and re-evaluate.
Step-by-Step Replacement
What you'll need:
- New pressure-treated or rot-resistant lumber (cedar, or a species rated for ground contact if the post meets soil) cut to length
- Adjustable steel shoring posts or 4x4 temporary posts with wedges
- Exterior-rated structural screws or bolts, hot-dip galvanized or stainless steel
The process:
- Install temporary support. Place shoring on both sides of the target post, bearing on solid ground. Tighten until firm contact is made. Confirm the beam has not moved.
- Disconnect the post. Remove bolts, screws, or brackets connecting the post to beams and footing. Penetrating oil helps with rusted fasteners. Support the post as you remove the last fastener so it does not fall.
- Cut the post free. If fasteners are inaccessible, cut the post a few inches above the footing and again near the beam, then pry out the remaining stub. A reciprocating saw with a wood blade is fastest.
- Inspect the footing and connection. Check the post base or bracket for rot, corrosion, and water trapping. Replace corroded hardware. If the post sat directly in soil or concrete, plan to install a standoff post base that lifts the wood above the moisture line.
- Cut and fit the new post. Measure the opening and cut the new post to length, allowing for the post base. Dry-fit before fastening. The post should be plumb in both directions; check with a level on two adjacent faces.
- Fasten the new post. Use the same connection details as the original, with exterior-rated fasteners. If the original used bolts through the beam, use the same bolt size and add washers. Do not substitute drywall screws or interior fasteners.
- Remove temporary support slowly. Loosen shoring gradually and watch for movement or noise. The structure should settle onto the new post without racking. If you see movement, re-tighten and investigate before proceeding.
- Seal the new wood immediately. Cut ends absorb water fastest. Apply exterior stain or paint to all faces, especially the top and bottom cuts, before or immediately after installation.
Footing and Base Details That Prevent Repeat Rot
Most post rot starts at the base. If the old post sat directly in soil or was embedded in concrete, the new post will rot the same way unless you change the detail. Install a standoff post base that raises the wood at least 1 inch above the concrete or soil surface and allows water to drain. Slope the top of the footing away from the post so water runs off rather than pooling at the base.
Finding and Fixing the Moisture Source
Rot always comes from moisture.
Water gets into wood through:
- Joints where members connect
- Cracks in paint or sealant
- Gaps between wood and metal fasteners
Walk around your pergola after rain. Where does water sit?
Common fixes:
Improve drainage. Slope horizontal members slightly so water runs off instead of pooling. Add gutters or drip edges to catch water from above.
Seal joints. Use exterior caulk to seal gaps where beams meet posts.
Add ventilation. Space boards slightly to allow air movement.
Move water away. Grade soil away from the base of posts.
The moisture source is the real culprit.
Wood rot in a pergola is fixable when you catch it early.
Frequently Asked Questions
How do you tell if pergola wood is rotting?
Rotted wood appears soft, spongy, or discolored, often darker or lighter than healthy wood. Press an awl or screwdriver into suspect areas; it should meet resistance in sound wood but sink easily into rotted fibers. Look for peeling paint, fungal growth, or a musty smell. Soft wood that crumbles when scraped indicates advanced rot requiring immediate attention.
What is the best wood filler for pergola repairs?
For small holes and gaps, use exterior-grade wood filler rated for outdoor use. For structural damage, wood rot repair epoxy provides superior strength and water resistance. Epoxy hardens to match surrounding wood and resists moisture infiltration. Always choose products labeled for exterior pergolas or deck use, and follow manufacturer curing times before painting or sealing.
Can you repair a rotted pergola post without replacing it?
Yes, if damage is minor and confined to the surface. Remove unsound wood with a chisel or scraper, stabilize remaining fibers with wood hardener, then fill gaps with exterior-grade epoxy or wood filler. However, if rot penetrates deep into the post's core or compromises more than 25% of the cross-section, replacement is safer and more durable for structural integrity.
How do you prevent wood rot in pergolas?
Maintain proper drainage by ensuring water runs off beams and posts rather than pooling. Apply protective coatings, paint, stain, or sealant, every 2-3 years. Install post bases that elevate wood above ground and allow air circulation. Trim nearby vegetation to improve airflow and reduce moisture. Address moisture sources like gutters or poor grading that direct water toward the pergola.