 ultimate-guide
What to Look for in a Pergola: 2026 Buyer's Guide
Table of Contents
- What to Look for in a Pergola: Start With Purpose and Placement
- Pergola Size Guide: Dimensions That Fit Your Patio
- Pergola Materials: Wood, Aluminum, Vinyl, and Steel Compared
- Pergola Shade Options: Louvered Roofs, Canopies, and Trellises
- Pergola Installation Requirements: Permits, Anchoring, and Assembly
- Wind, Snow, and Climate Load Ratings
- Accessories, Lighting, and Long-Term Costs
- Conclusion: A Checklist for Choosing Your Pergola
- Frequently Asked Questions
Last Updated: October 12, 2026
What to Look for in a Pergola: Start With Purpose and Placement
A pergola buying guide should start with the basics: a freestanding or attached structure of posts, beams, and a roof grid that defines a patio and controls sun without fully enclosing it. Knowing what to look for in pergola shopping starts with two questions: what will this structure do, and where will it stand?
That order matters more than any spec sheet: a pergola shading a dining table needs different proportions than one framing a walkway.
Match the Structure to How You Will Use It
Use case drives every downstream decision: roof type, span, anchoring, and accessories. Dining and entertaining call for broad shade coverage and room to move chairs. A reading nook or hot tub cover needs tighter dimensions and better rain management. Plant support calls for an open trellis roof rather than a solid one.
Decide the primary use first, then let it filter your options. Buyers who skip this step often buy twice.
Site Selection: Sun, Drainage, and Clearance
Site selection is the step most buyers rush and the hardest to fix later. Watch your spot across a full day to see where sun lands morning versus late afternoon, and check how water moves after rain, since a low corner that pools will undermine any structure over time. Then measure clearance: headroom under the beams, space for furniture, and room to walk around the posts without ducking.
Pergola Size Guide: Dimensions That Fit Your Patio
A pergola size guide starts with a simple rule: measure your furniture and circulation first, structure second. A dining set for six needs a footprint that lets chairs slide back without hitting a post, usually a larger span than buyers expect. Standard rectangular kits run from compact 10 by 10 footprints up to 12 by 24 for long patios and event use.

| Footprint | Best For | Typical Use |
|---|---|---|
| 10 x 10 | Small patios, bistro sets | Intimate seating |
| 10 x 12 | Dining for four to six | Backyard dining |
| 10 x 13 | Lounging and entertaining | Seating areas |
| 16 x 12 | Poolside, large decks | Open-air coverage |
| 12 x 24 | Long patios, events | Carport or gathering space |
Measuring Your Space Before You Order
Measure the patio's usable area, not the property line. Account for posts, which eat into your clear span, and leave a comfortable walking gap around the perimeter. If your yard is small or oddly shaped, sketch the footprint and place cardboard cutouts where furniture will sit, a low-tech check that prevents costly returns.
Pergola Materials: Wood, Aluminum, Vinyl, and Steel Compared
Pergola materials split into four families, each trading maintenance against cost and feel. Wood, typically cedar, brings warmth and natural grain but wants occasional sealing. Aluminum resists rust with little upkeep, which is why it dominates louvered designs.
- Wood (cedar): Beautiful and paintable, but expect periodic treatment to hold up against sun and humidity.
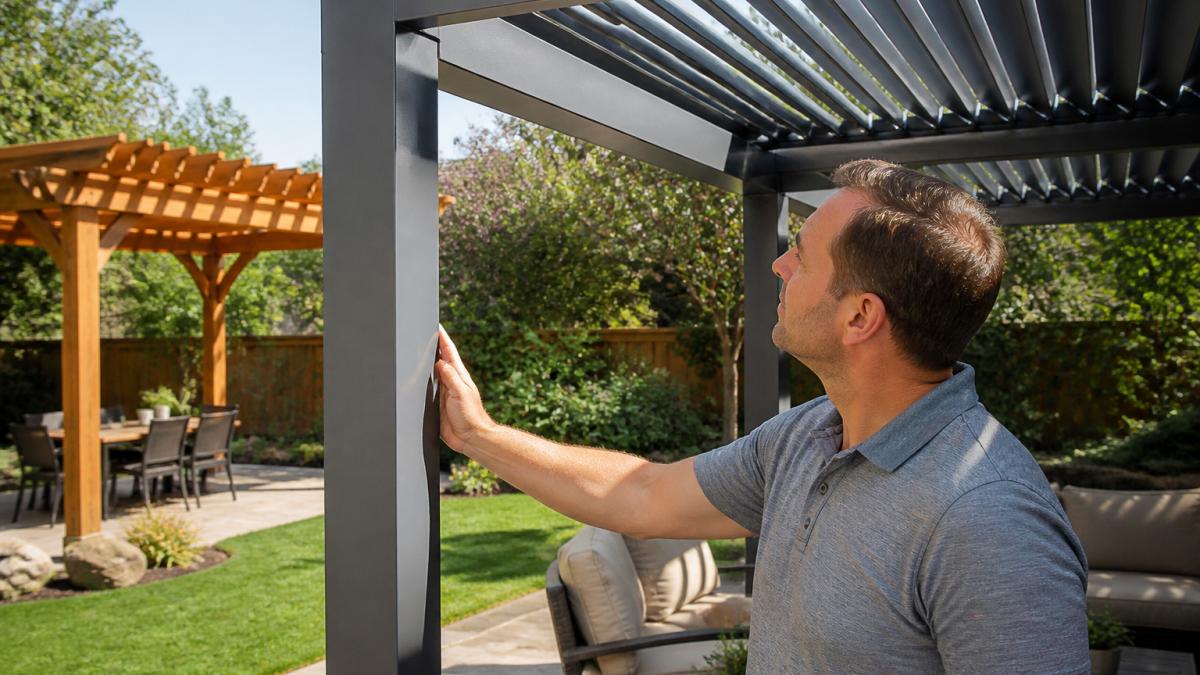
- Aluminum: Powder-coated frames resist rust, moisture, and UV fading with minimal care. Best all-rounder for harsh weather.
- Vinyl: Low maintenance and moisture-proof, but limited in style and color.
Pergola Shade Options: Louvered Roofs, Canopies, and Trellises
Pergola shade options come down to how much control you want over sun and rain. A louvered roof lets you angle the slats to dial in light and airflow. A fixed roof or canopy delivers consistent cover. An open trellis offers the least shade but the most plant support and air movement.
Adjustable Louvers vs. Fixed Roofs
Adjustable louvers win on flexibility: open them for a breeze and stargazing, then close them when rain rolls in, which is why louvered designs have become the default for year-round use.
Drainage is the detail that separates good louvered pergolas from frustrating ones. Look for integrated channels that route rainwater through the frame and down the support columns, so it exits at ground level instead of dripping onto your furniture.
Pergola Installation Requirements: Permits, Anchoring, and Assembly
Pergola installation requirements vary by jurisdiction, and this is where buyers get surprised. Most municipalities treat a permanent structure as an improvement to the property, meaning a building permit, a zoning review, or both, and homeowners associations can layer stricter rules on top. Resolve compliance before you order, because returning a partially assembled structure is far harder than filing a form upfront.
A Pre-Purchase Compliance Checklist
Work through these steps in order. Each one can change what you are allowed to build and where you can put it.
- Call your local building department. Ask two questions: does a permit apply to a structure of this size, and what setbacks apply from property lines? Many jurisdictions exempt small, low structures but require a permit once the footprint or height crosses a threshold. Get the answer in writing if you can.
- Confirm your zoning district. Zoning sets maximum height, lot coverage, and how close a structure can sit to a property line. A pergola that fits your yard may still violate a setback.
- Read your HOA covenants and architectural rules. HOA rules are often stricter than the city on height, placement, color, and material, and many require an architectural review application with a site plan and product spec sheet.
- Check any easements on your lot. Utility, drainage, and access easements restrict what you can build over or near them, even if the city would otherwise approve.
- Submit the application before you buy. Approval timelines vary widely, and a denial after delivery leaves you storing a large crate.
Anchoring by Surface Type
Anchoring matters as much as paperwork, and the right method depends on what the posts sit on.
- Concrete slab or footing: Expansion bolts or wedge anchors set into pre-drilled holes. This is the most secure option and the one most wind-rated frames are tested against.
- Wooden deck: Pre-drilled base plates fastened with lag bolts or structural screws into framing members, not just deck boards. Confirm the deck framing can carry the point loads.
- Soil or gravel: Concrete footings poured below the frost line, with post bases set above grade so wood or metal never sits in standing water. Ground stakes alone are not a substitute for footings on a permanent structure.
Follow the manufacturer's anchoring specification for your surface. A frame rated for high wind only performs to that rating when it is anchored as tested.
Assembly: What the Process Actually Involves
Most kits ship as posts, beams, rafters, and hardware with a step-by-step manual. Expect to need two people for the frame lift, a level, a drill, and a ladder. Attached pergolas add a step: fastening a ledger board to the house, which means locating framing and flashing the connection so water does not track behind the siding. Freestanding units avoid that step but need footings at every post.
Wind, Snow, and Climate Load Ratings
Load ratings tell you what a pergola is engineered to handle, and they're the spec buyers overlook most. Wind and snow are the two forces that stress a frame, and a structure rated for calm conditions can fail in a storm.
10' X 12' Louvered Pergola, Aluminum Frame Outdoor Pergola with Adjustable →
Our 10 by 12 louvered pergola uses a high-strength aluminum frame anchored with expansion bolts and handles wind speeds up to 72 mph, with a canopy that supports snow accumulation up to 6 inches.

Accessories, Lighting, and Long-Term Costs
Accessories turn a pergola into a room, and the time to plan them is before installation, not after. Wiring, mounting points, and control locations are far easier to build in than to retrofit.
Plan Wiring and Controls Before Installation
Lighting is the first upgrade most owners make, and the choices affect the frame. String lights need only hooks or a channel; integrated LED strips and low-voltage fixtures need a power run and often a transformer. Fans, heaters, and motorized louvers draw more power and may need a dedicated circuit. Smart controls let you adjust louvers, lighting, or heating from a phone, but need a control module and reliable power at the structure.
Accessories That Change the Design
- Retractable canopies and screens: Add shade and rain cover to open designs, and screens add privacy and insect control. Both need mounting tracks, so confirm the frame supports them.
- Heaters: Extend the season, but infrared and gas units have different clearance and ventilation needs. Gas requires a fuel line or tank placement.
- Fans: Improve airflow under a solid or louvered roof and need a rated mounting point and power.
Total Installed Cost and Long-Term Ownership
Purchase price is only part of the number. A realistic budget accounts for four layers:
- The structure itself. Kit, semi-custom, and custom frames sit at different price points, and louvered roofs generally cost more than fixed or trellis designs.
- Site and foundation work. Footings, concrete, deck reinforcement, or surface prep. This is the line item buyers most often forget.
- Installation. DIY saves labor but costs time and tools; professional installation adds labor and may be required for attached or permit-involved projects.
- Electrical and accessories. Wiring, outlets, lighting, fans, heaters, and screens, plus any smart control modules.
On top of that, plan for ownership costs. Aluminum and vinyl need little upkeep beyond occasional cleaning. Wood rewards periodic oil-based or water-based treatment to stay weather-resistant, and untreated wood in a wet climate can need attention every couple of seasons. A structure that lasts a decade or more usually costs less over time than a cheap one you swap out repeatedly, so compare total cost of ownership, not just the sticker.
Conclusion: A Checklist for Choosing Your Pergola
This pergola buying guide gets simpler once you work in order: purpose, placement, size, material, roof, permits, and loads. Skip a step and you'll feel it later, usually as a return or a rebuild.
Use this checklist before you commit:
- Confirm primary use and furniture footprint
- Track sun and drainage at the site across a full day
- Measure usable space, including post and clearance gaps
Choosing a pergola you won't have to replace means buying for the conditions you actually have, not the ones you wish you had. Backyard Comfort CO builds weather-ready structures designed to hold up season after season, with solid wood and aluminum options, free shipping on most orders within the continental U.S., and a straightforward 30-day return policy.
Frequently Asked Questions
What size pergola should I choose for my patio?
Measure your patio and leave at least 2 feet of clearance on each side so the pergola does not feel cramped. A 10x10 or 10x12 pergola fits most small to medium patios, while a 12x24 or 16x12 structure suits larger entertaining areas. Think about furniture placement first: a dining set for six needs roughly 10x10 feet of covered space. If your yard is oddly shaped, sketch the footprint on graph paper before ordering a kit.
Which pergola material holds up best outdoors?
Aluminum resists rust, moisture, and UV damage with minimal upkeep, making it a strong choice for humid or coastal climates. Cedar and other woods offer natural beauty and weather resistance but need occasional staining or sealing. Vinyl and steel each have trade-offs in weight, cost, and finish options. For year-round durability without refinishing, powder-coated aluminum is hard to beat.
Do I need a permit to install a pergola?
Permit requirements vary by city, county, and homeowners association. Many municipalities require a permit for structures above a certain height or square footage, and HOAs often have their own rules about placement and appearance. Before you buy, check with your local building department and review your HOA guidelines. Some pergola listings, like the 10x13 adjustable louvered aluminum model, explicitly advise consulting local codes before purchase.
How much shade does a pergola provide?
A traditional trellis-roof pergola offers dappled shade that shifts with the sun, which is ideal for climbing plants but limited for full coverage. A louvered-roof pergola with adjustable slats can block up to 99% of UV rays when fully closed, giving you control over sun and rain protection. Retractable canopies add another layer of flexibility, letting you open or close the roof as conditions change.
How long does pergola assembly take?
Assembly time depends on the kit and your experience. Some aluminum louvered pergolas are designed for 4 to 6 hours of setup with labeled parts and video guides. Larger cedar wood pergolas may take 2 to 3 hours with 3 to 4 people. Having a level base, pre-drilled anchors, and a helper speeds things up considerably. If you are not comfortable with tools, hiring a handyman is a reasonable option.
Can I install a pergola on a wooden deck?
Yes, but you need to anchor it properly. Many pergola kits include pre-drilled bases and corrosion-proof hardware for wooden decks and concrete. Expansion bolts work well on concrete, while lag screws or deck-specific anchors are better for wood. Always check that the deck structure can handle the load, especially in areas with high winds or snow. A level base is critical for stability and louver operation.
What should I check before installing a pergola?
Confirm local permit and zoning requirements, HOA rules, and property line setbacks. Check the wind and snow load ratings for your area and make sure the pergola meets them. Verify that your patio or deck is level and that the anchoring method suits the surface. Finally, plan for drainage and clearance so the structure does not block doors, windows, or walkways.
Is it cheaper to build your own pergola or buy a kit?
A kit usually costs less than hiring a carpenter to build from scratch, and it comes with pre-cut parts, hardware, and instructions. Custom builds allow for exact dimensions and design freedom but require more time, tools, and skill. For most homeowners, a kit offers the best balance of price, convenience, and predictable results. Compare the total cost including any permits, anchoring materials, and installation help.