
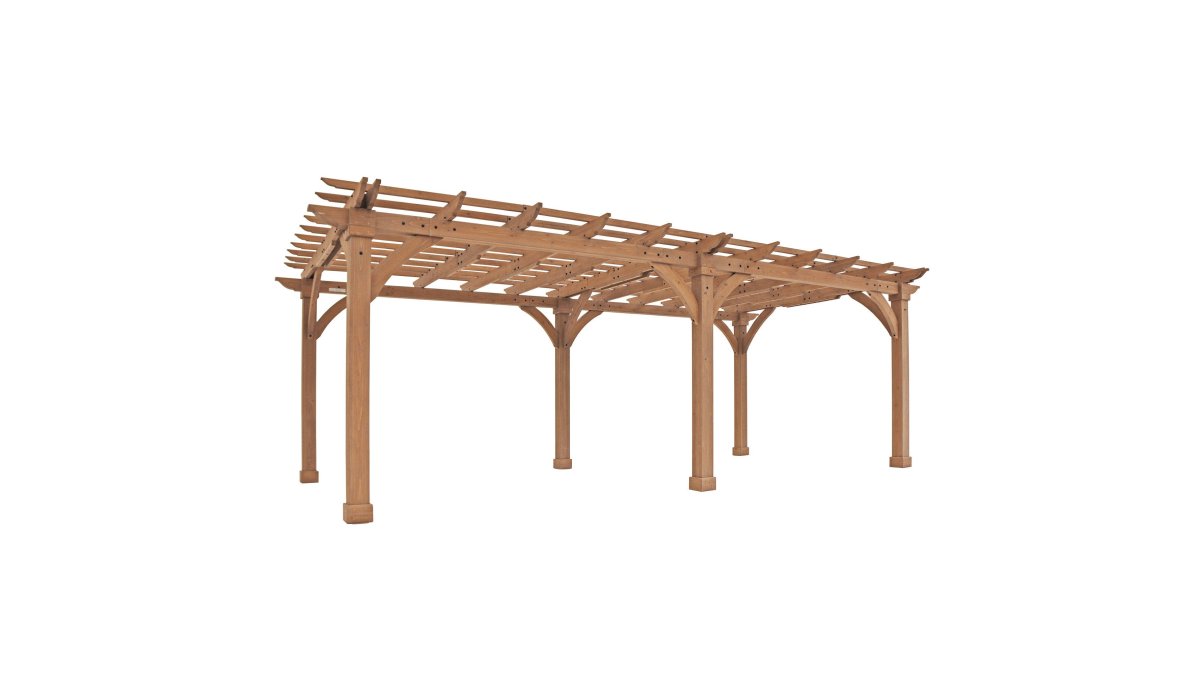
 listicle
Durable Wood Pergolas for Sale With Free Shipping
Table of Contents
- What Makes a Wood Pergola Worth Buying in 2026
- Quick Comparison: Durable Wood Pergolas for Sale With Free Shipping
- The Best Wood for Outdoor Pergolas: Cedar vs. Pine
- How to Anchor a Pergola to Concrete, Decks, and Patios
- Pergola Installation Tips for Beginners
- Pricing, Shipping, and What Free Freight Actually Covers
- Maintenance, Wood Treatment, and Long-Term Longevity
- Conclusion
- Frequently Asked Questions
Last Updated: October 3, 2026
What Makes a Wood Pergola Worth Buying in 2026
A durable wood pergola is a permanent outdoor structure built from naturally rot-resistant or pressure-treated lumber, designed to hold its shape through years of sun, rain, and freeze-thaw cycles. At Backyard Comfort CO, we stock solid cedar and treated pine pergola kits that arrive pre-cut and pre-drilled. Four things separate a pergola that lasts from one that sags: wood species, joinery, anchoring, and finish.

Below, we cover which wood survives weather, how to anchor a pergola to concrete or a deck, what assembly involves, and what free freight covers.
Quick Comparison: Durable Wood Pergolas for Sale With Free Shipping
Every kit below ships free within the continental U.S. and comes with a 30-day return window. Sizes run from compact 10x10 patios up to a 12x24 footprint.
| Pergola | Size | Wood | Price | Best For |
|---|---|---|---|---|
| 10 Ft. W X 10 Ft. D Cedar Pergola | 10x10 | Cedar | $931.86 | Small patios, first pergola |
| 12 Ft. W X 12 Ft. D Cedar Pergola | 12x12 | Cedar | $919.87 | Standard patio seating |
| 16 Ft. W X 12 Ft. D Cedar Pergola | 16x12 | Cedar | $1,234.94 | Dining sets, larger decks |
| 20 Ft. W X 12 Ft. D Cedar Pergola | 20x12 | Cedar | $1,661.75 | Wide patios, entertaining |
| 12 Ft. W X 10 Ft. D Solid Wood Pergola | 12x10 | Southern Yellow Pine | $3,464.21 | Arched design, stained finish |
| 12' x 24' Cedar Wood Pergola | 12x24 | Cedar | $3,711.64 | Full outdoor kitchens |
The Best Wood for Outdoor Pergolas: Cedar vs. Pine
Cedar wins on natural durability. Cedar's natural oils repel insects and resist decay without chemical treatment. Pine costs less per board foot but only performs outdoors when pressure-treated and sealed.

Cedar: Natural Decay and Insect Resistance
Cedar's tight grain and natural oils make it the default choice for outdoor structures in most of the country. It resists moisture uptake, so it swells and shrinks less through seasonal changes, keeping joints tight and beams straight. Our 10 Ft. X 10 Ft. Traditional All Cedar Wood Outdoor Patio Pergola uses 100% cedar uprights at 5-1/2 inches per side.
Southern Yellow Pine: Treated Strength at a Lower Cost
Southern Yellow Pine is denser than cedar, giving it excellent structural strength for spans and headers. The catch is treatment: untreated pine is not a long-term outdoor wood. Our 12 Ft. W X 10 Ft. D Solid Wood Pergola uses laminated pine posts with notched intersections that lock the top together and resist warping, and it's available upgraded to treated Southern Yellow Pine in a Canyon Brown stain.

How to Anchor a Pergola to Concrete, Decks, and Patios
Anchoring is where most DIY pergola projects fail, and it's the step most product pages skip. A pergola is a sail: four posts holding a heavy roof structure catch wind from every direction, and if the base moves, the whole frame racks out of square.
Concrete Pads: The Most Forgiving Surface
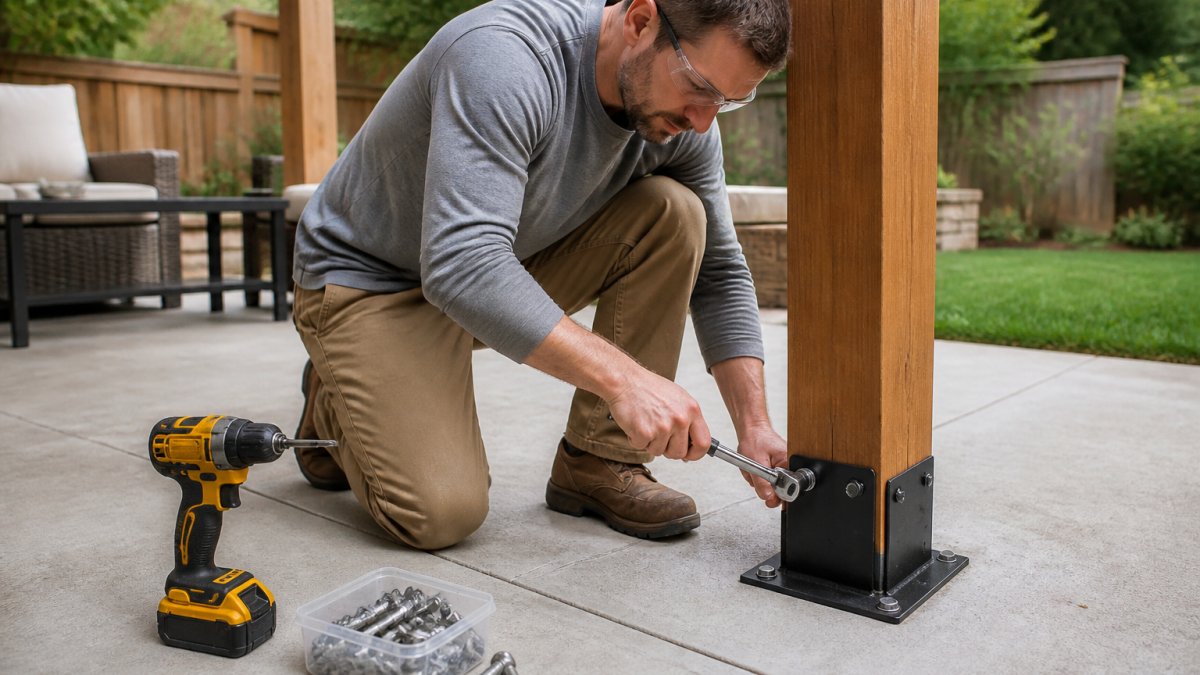
A poured concrete pad is the simplest base because the slab itself resists uplift. Use expansion bolts (wedge anchors) through the post base plate: drill the hole to the specified diameter, blow or vacuum the dust out, then torque the bolt so the wedge expands inside the slab.
If you're pouring a new pad, a 4-inch slab reinforced with wire mesh is usually adequate for a single pergola, but check with your local building department, many jurisdictions require a footing inspection before the pour.
Wooden Decks: Anchor Into Structure, Not Decking
Decks are the trickiest surface because deck boards alone will not hold a pergola. Use lag bolts driven into blocking or a joist below the deck surface, never into deck boards alone, which pull free under wind load.
A common pattern is to run a doubled 2x10 or 2x12 beam under the deck surface spanning at least two joists, then lag the post base into that beam, spreading the load across the deck frame.
Patio Pavers, Gravel, and Dirt: Footings Are Non-Negotiable
On anything that isn't a structural slab or framed deck, you need a concrete footing for each post. Footing depth is set by your local frost line, the depth to which the ground freezes in winter. In cold climates that can mean 36 to 48 inches; in mild climates as little as 12 inches.
A typical footing is a concrete pier 10 to 12 inches in diameter, poured below the frost line, with a metal post base embedded in the top to keep the wood out of direct contact with concrete.
Anchoring Kits and Hardware That Come With the Kit
Most of our cedar pergolas ship with expansion bolts, ground stakes, and reinforced metal connectors for the post-to-beam joints. The 12X24 FT Premium Cedar Wood Pergola includes six heavy-duty posts, reinforced metal connectors, expansion bolts, and ground stakes. Decorative post skirts hide the anchor brackets once installation is finished.
Match the anchor to the surface, not the other way around: expansion bolts for concrete, lag bolts into blocking for decks, and poured footings below the frost line for pavers, gravel, or dirt. The kit hardware is the same; the site prep is what makes it hold.
Pergola Installation Tips for Beginners
Budget two to three hours for assembly with three or four people, and treat the first hour as a layout exercise, not a build. Pergola installation tips for beginners usually skip the part that matters most: getting the posts square and level before you attach anything overhead. Measure the diagonals between post centers. If they don't match, adjust before you bolt the beams.
- Stage the parts first. Lay out posts, beams, and hardware in the order you'll use them. Our kits arrive pre-cut, pre-drilled, and pre-stained, so there's no cutting on site.
- Set posts before beams. Anchor all four posts, check square, then work upward.
- Recruit help for the header. Lifting a dual-ply header alone is how people get hurt and how beams get dropped.
- Check local rules first. Many municipalities require a permit for a permanent structure, and some HOAs restrict height or footprint. Verify before you dig.
The 12' x 24' Cedar Wood Pergola includes heavy-duty post mounts for concrete pads, decks, or existing patio foundations, so the anchoring method is decided by your surface, not by the kit.
Pricing, Shipping, and What Free Freight Actually Covers
Free shipping on most orders within the continental U.S. means the freight cost is already in the listed price, and for a pergola that's a meaningful number. A 12x24 kit ships in five separate packages that may arrive on different days, so plan a staging area rather than a single delivery window. Check every box against the packing list before assembly; a missing bracket is easy to resolve before installation and frustrating mid-build.
| Budget Tier | Size Range | Price Range | Typical Use |
|---|---|---|---|
| Entry | 10x10 to 12x12 | $919 - $932 | Small patio, seating for four |
| Mid | 16x12 to 20x12 | $1,235 - $1,662 | Dining sets, larger decks |
| Full-size | 12x24 | $3,712 | Outdoor kitchens, large gatherings |
| Pine arched | 12x10 | $3,464 | Stained finish, arched joists |
Maintenance, Wood Treatment, and Long-Term Longevity
Cedar needs almost nothing for the first several years. Longevity is decided by how you treat the wood in the first month and how you inspect it each spring, not by the species label alone.
Cedar vs. Pine: Different Clocks, Different Routines
Cedar contains natural oils that repel insects and resist decay. Pine has no such natural defense; pressure-treated pine is protected by treatment chemicals.
Both benefit from a protective sealant or water-based stain every two to three years. The key word is water-based.
Where Rot Actually Starts
Rot doesn't begin on the broad faces of a beam. It begins at the cut ends, drilled holes, and any joint where water can sit. That's why the most important maintenance habit is treating every exposed end grain and drilled hole with a brush-on sealer, even on pre-stained kits. Those spots absorb water faster than the factory finish and are where decay takes hold first.
A simple spring inspection catches most problems early:
- Probe the post bases. Push a screwdriver into the wood near the anchor bracket. If it sinks easily, the wood is soft and rot has started.
- Check the joint intersections. Where the beams cross the posts, look for dark staining or a musty smell, both are early signs of moisture trapped in the joint.
- Look at the end grain. Cracks wider than a credit card, or a spongy feel, mean the wood is checking and taking on water.
- Clear the roof beams. Debris that collects on top of the rafters holds moisture against the wood. Clean it each spring so water doesn't pool in the joints.
Seasonal Care by Climate
In humid climates, mold and mildew are the main threats; a diluted oxygen bleach wash followed by a fresh sealer is the standard fix. In dry climates, the enemy is UV and checking, so a UV-blocking stain every two to three years pays off.
Remove snow within 24 hours of a heavy storm using a long-handled roof rake or soft broom. Don't chip at ice with a metal tool, you'll gouge the finish and create a new place for water to sit.
Treat the cut ends and any drilled holes with a brush-on sealer, even on pre-stained kits. Those exposed spots absorb water faster than the factory finish and are where rot starts.
Longevity is a routine, not a species.
Conclusion
Choosing a durable wood pergola comes down to matching the wood species and anchoring method to your climate and surface, then committing to a light maintenance routine. Backyard Comfort CO builds solid wood pergolas with weather-ready construction, free shipping on most orders within the continental U.S., and a 30-day return policy. Browse our cedar and pine pergola kits and find the size that fits your patio.
Frequently Asked Questions
What wood species is most durable for outdoor pergolas?
Cedar and treated Southern Yellow Pine are the two most durable options. Cedar carries natural oils that resist decay, insects, and moisture without chemical treatment, which is why it appears across most of the models above. Treated Southern Yellow Pine is pressure-treated for weather resistance and costs less. Both hold up for decades when sealed periodically. Cedar wins on low maintenance; pine wins on upfront price.
How do I anchor a wood pergola to concrete?
Set the post base over the concrete pad, mark the bolt holes, then drill with a masonry bit and drive expansion bolts through the anchor bracket. The cedar kits on this page ship with expansion bolts and ground stakes, plus decorative post skirts that hide the hardware once installed. For deck mounting, lag bolts into the framing work instead. Never anchor only into the concrete surface layer, since wind uplift will pull shallow fasteners free.
Does free shipping usually include heavy freight for pergolas?
Yes, on most orders within the continental U.S. Pergolas ship as freight because of the weight and length of the posts, so a 12' x 24' kit may arrive in five separate packages on different days. Confirm the delivery window and inspect each carton for damage before signing. If something arrives damaged, the 30-day return policy covers it, so photograph the packaging before you unpack.
How long does it take to assemble a wood pergola kit?
Most kits take about 2 to 3 hours with 3 to 4 people, since the lumber arrives pre-cut, pre-drilled, and pre-stained with all assembly hardware included. Two people can manage a 10' x 10' model; larger 12' x 24' spans need the extra hands for lifting beams overhead. Budget a full afternoon for the first build, including layout and anchoring.
How often do I need to treat a wood pergola to keep it durable?
Cedar resists rot and insects on its own. Remove snow within 24 hours of heavy snowfall using a long-handled roof rake to protect the load-bearing beams.